
Background
Developing web app is a pleasure, but not for deployment, especially for tight-budget hobbyist. The need to set a home lab for experiments emerged as few free-tier deployment options on hand, and more prototype built for learning purposed. In addition, spoiled by PaaS such as Heroku or Render, deploy from github feeling like a magic, where you just “push", and your web service is well established with high security setting.
Goal
This project aims to learn basic Linux, network, and security by setting a home lab. While the basic security best practice should be met, the deployment process should as similar as the PaaS to ensure easy shifting from and to other platforms or infrastructures.
Process
The setting is mainly down in the following steps:
- Setup a Debian system which could ssh in.
- Set up a system that can be safely accessed externally.
- Setup a deploy flow similar as PaaS.
- Setup a monitoring system.
An overall setting of the home lab is a Figure 1 shows.

Figure 1: The overall home lab setting
1. Setup a Debian system which could ssh in.
After downloaded from the Debian system mirror, the first challenged is the the usually learning pattern for me, “asking ChatGPT or searching the internet, paste the code, update and try" is not feasible as lack of GUI. So using ssh (Secure Shell) is a most to boost the learning pace.
To safely setup the ssh, I use Tailscale for setting the VPN (Virtual Private Network), and also set both firewall (iptable) and intrusion prevention (fail2ban). The firewall setting is basically default DROP for both INPUT and FORWARD traffic, and fail2ban to mitigate brute-force attack.
For SSH config, I turnoff the password authentication, and use public key Authentication to prevent password guessing attack. I also changed my ssh port for the sake of obscurity, and if the port I used get hit, the iptable will log the try, as it might indicates someone know my ssh port and try to access it.
2. Set up a system that can be safely accessed externally.
As router at my place not allowed for setting static IP address, deploying service on the home lab required another way to be accessed externally. Since I also require a domain to unify my services, I bought a domain from Cloudflare, and utilize its tunnel. By setting up the tunnel as a container, traffic could easily access my web service in my docker network.
3. Setup a deploy flow similar as PaaS
Choosing docker as the main deployment approach is a no-brainer for me, as it is kind of hardware-agnostic and platform-agnostic. Based on the cloudflare tunnel just set, I use traefik as reverse proxy to coordinate the incoming traffic, and use docker compose to deploy my services. (as well as the tunnel and traefik itself) This approach provide a portable way to deliver my service: Add a compose file which get the image from docker hub, then the deployment is available. To pause or deleted the service, just use docker compose down.
The docker compose file is in this github repo.
4. Setup a monitoring system
Due to lack of monitoring knowledge, I use Checkmk for my monitoring system, as it provide many default monitoring setting. To ensure a duplicated install process (in case I change a machine in the future), I use Ansible to automate the install and setting process of Checkmk. The short yaml file for ansible chould be check in this github repo.
Figure 2 shows a snapshot of the Checkmk monitoring system which checking the Temperature Zone 3 of the machine.
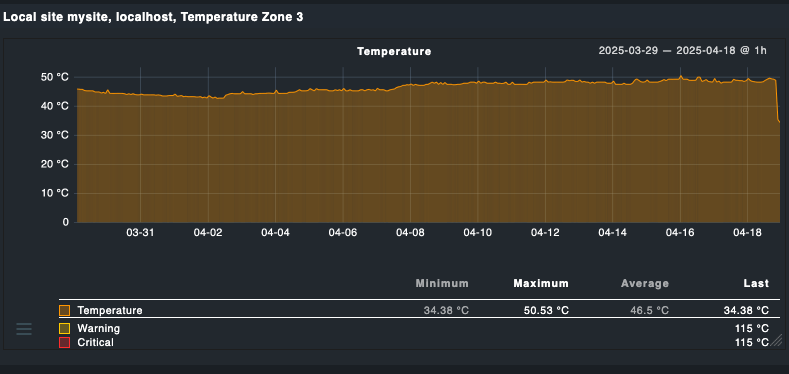
Figure 2: The snapshot of the Checkmk monitoring system